FAFSA Verification
Learn about FAFSA Verification at Yavapai College, including Student Forms registration, required tasks, document submission, and e-sign steps.
FAFSA Verification
Back to Financial Aid OverviewWhat is Verification?
Verification is a process by which the college is required to collect documents from students and compare them to the responses provided on the Free Application for Federal Student Aid (FAFSA). Verification, if required, must be completed and approved to receive financial aid. After the student submits their verification, it can take up to two weeks to review a FAFSA verification. The due date for verification is dependent on each student’s circumstances.
If a student is selected for verification after receiving their financial aid offer, they will be notified through their YC scholar email.
How will I know if I need to verify my FAFSA?
When we have received your FAFSA, you will receive email confirmation. Login to https://www.yc.edu and click on My Account > Student Financials > My Financial Aid. If you see a “FAFSA Verification Required” link with the status "Not Received", you will need to complete requirements through Verify My FAFSA before any federal financial aid can be awarded. Clicking on the link will take you to a new web page.
You may also have additional non-verification requirements under the "Unsatisfied Requirements" section of your Eligibility requirements.
Students who do not complete their FAFSA verification are not eligible for federal financial aid.
Steps to Verify your FAFSA through https://www.yc.edu via Student Forms
-
After logging into https://www.yc.edu go to My Account > Student Financials > My Financial Aid > select the Aid Year (top right corner) > in the Unsatisfied Requirements click on the words “FAFSA Verification Required.” It will take you to a new webpage called Student Forms.
-
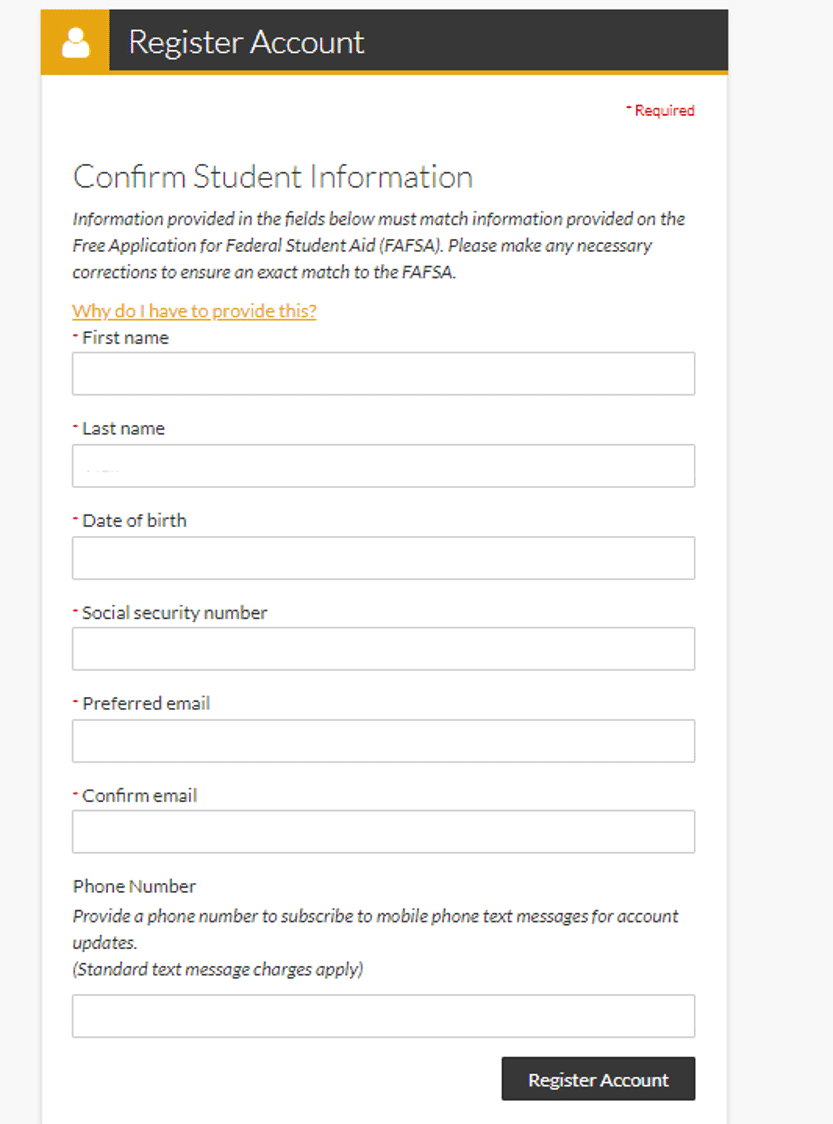
Register your Student Forms account.
Complete any missing information and click the "Register Account" button. You will only register your account once. After that, you will be automatically signed in on any future visits to the page.
Tip: Verify that your email address, name, birthdate, and social security number match what you put on your FAFSA application. If the system automatically puts your YC scholar email, change it to your personal email address listed on the FAFSA.
-
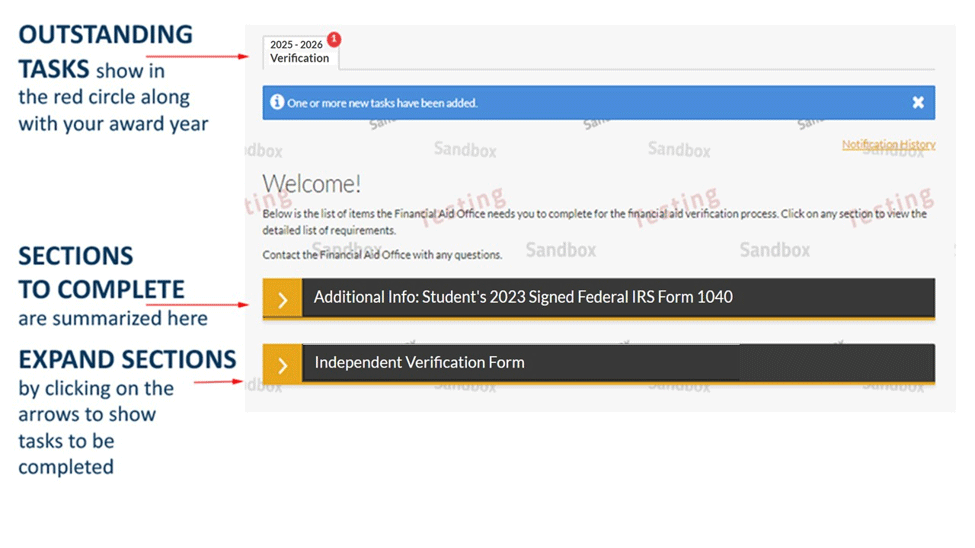
Next, it will take you to the overview page on Student Forms. This page provides a list of the tasks you need to complete. This is where you will verify your FAFSA.
Click on the white arrows to open each section to see the individual tasks that need to be completed.
-
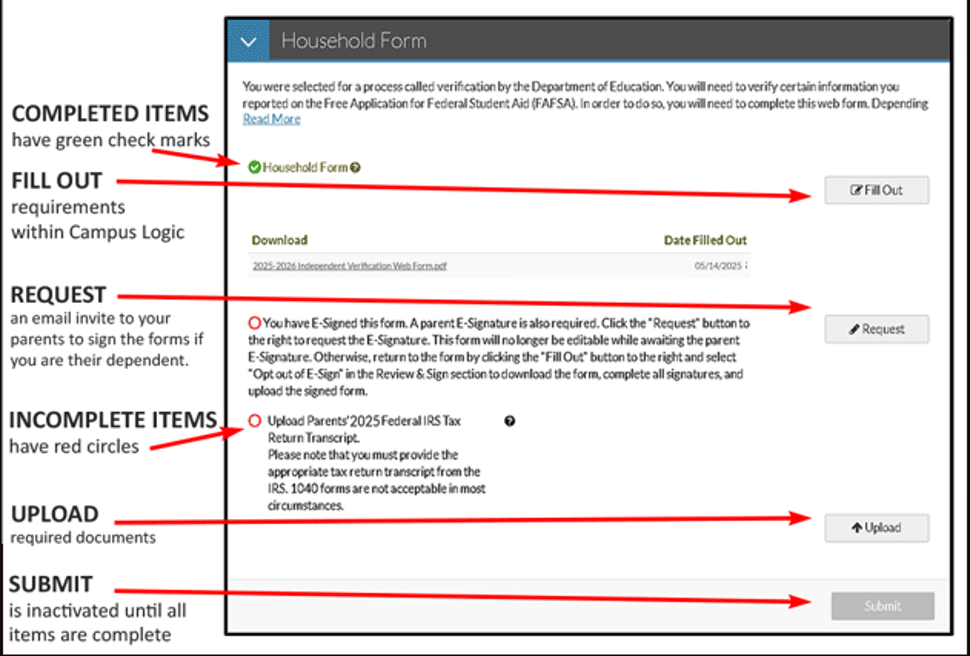
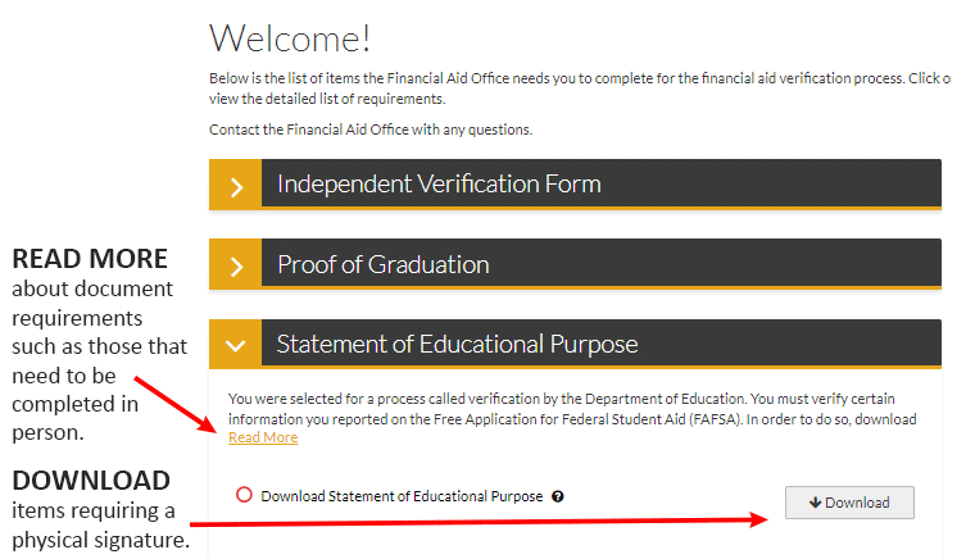
How to navigate requirements section:Each section will have tasks to be completed. Some areas will require you to fill out information within the webpage form. Other areas will request you to upload documents such as a tax return transcript.
-
Once all tasks are complete, the Submit button will be enabled so you can submit your documentation.
Tip: Use your smartphone to take legible pictures of your documents and upload them instead of using a scanner
-
About Student Forms e-sign:
Student Forms now gives you the ability for you and your parents (if you are a dependent), the opportunity to electronically sign (e-sign) your financial aid documents instead of having to print them out and sign them. In order to do this, you will need to set up a five-digit PIN number which will be used in place of your hardcopy signature on the documents. You can also decide to not e-sign at any point.
How to e-sign your Student Forms document:
Student Forms gives you the ability for you and your parents (if you are a dependent), the opportunity to electronically sign (e-sign) your financial aid documents instead of having to print them out and sign them. In order to do this, you will need to set up a PIN number which will be used in place of your hardcopy signature on the documents. You can also decide to not e-sign at any point.
NOTE: Students and Parents must both either e-sign or print the hard copies of the documents and sign them. You cannot have one person e-sign and the other person(s) do a hardcopy signature.
Steps for Students creating their five-digit PIN for e-signing
-
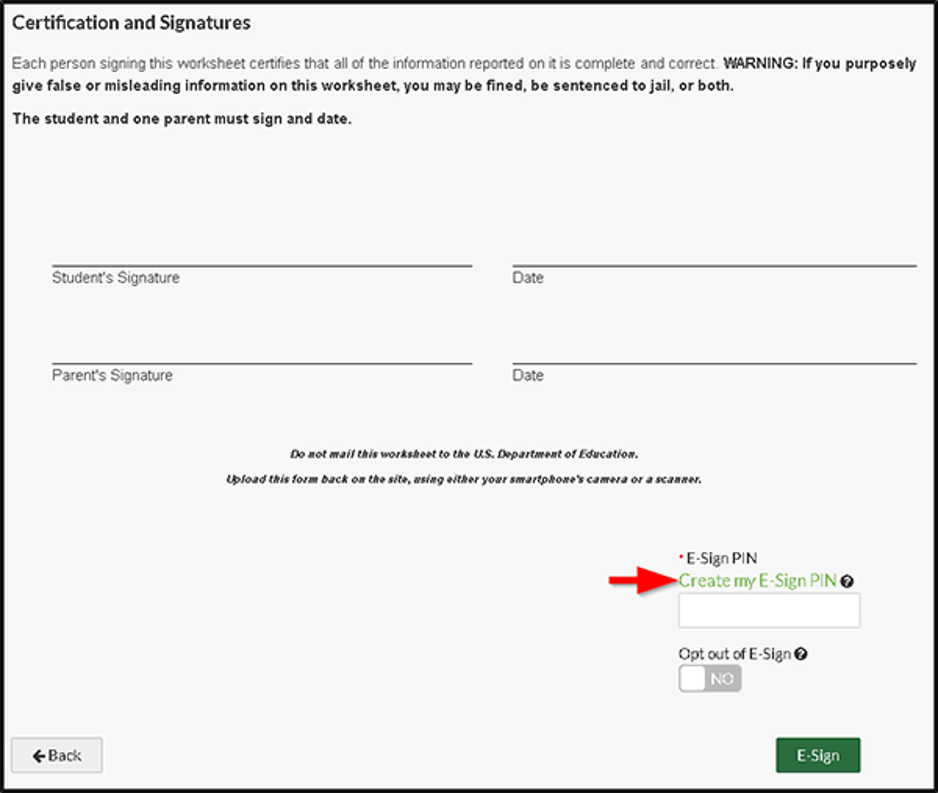
The first time that a student e-signs a webform, they must create a five-digit e-sign pin to sign electronically. Look for the link as seen below:
-
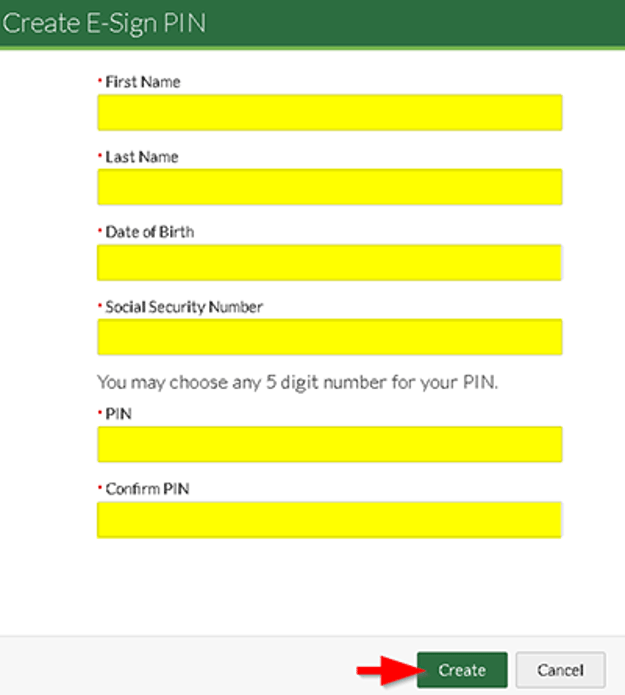
To establish a PIN, The student must provide the following required information:
- First Name
- Last Name
- Date Of Birth
- Social Security Number
Please note: Information must match information exactly as it appears on the student's FAFSA/ISIR, the same as when a student is registering their account.
-
The student creates a five-digit number for a pin. Then re-enter the five-digit pin a second time to confirm it. Then click “Create.”
-
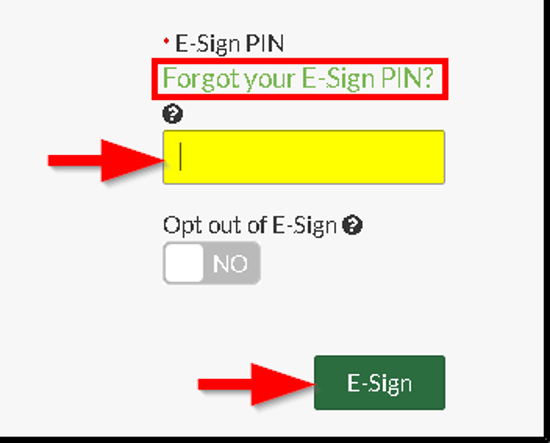
Once a pin has been created, the student is redirected to the review and sign screen. The student is able to enter their five-digit pin to e-sign their document. The “Create E-Sign PIN” changes to a “Forgot your E-Sign PIN?” once the pin has been created.
Click HERE to learn how to create the Parent Account
Click HERE to learn how to create the Parent E-Sign